Let’s know how to make an e-commerce website in WordPress.
You want to set up an online store, and you are looking for WordPress to do it. Today 30% of websites are powered by WordPress, and with good reason. It’s a powerful, scalable platform!
First, you need to choose a domain name and a web hosting provider that gives you your chosen domain name for free.
Since your web hosting provider determines the loading speed, uptime and other functionality of your WordPress store, I highly recommend choosing Interserver. It is one of the best web hosting providers that are cheap and reliable.
Your domain name is basically the unique address of your website. This is ‘www.’ in your url. The later part. It is generally a good idea to keep your domain name as close to your brand name as possible and keep it short and memorable.
There are two main ways to install WordPress:
1. ‘One-click’ install through your hosting dashboard
2 . Downloading WordPress manually, then uploading it to your hosting account
Install and Configure WooCommerce
WooCommerce is the most popular plugin for adding ecommerce functionality to your site. It has a 4.6/5 rating from over 3,000 users, and has over 5+ million active installations. It’s fair to say that it’s very popular, and it’s easy to see why.
For starters, it’s free. Just like WordPress, WooCommerce is an open-source platform built by a community. While you may have to pay for some ‘extensions’ (such as the ability for customers to book appointments), you can turn your site into an online store without spending a dollar. Contains:
1. Product page
2.Cart & Checkout
3. Secure Payment
4. Shipping Options and Label Printing
5.Automatic Tax Calculations
6. Integration with Google Analytics, Facebook, MailChimp etc.
1. Install and Activate WooCommerce
Log in to your WordPress dashboard, and go to the plugin directory by clicking ‘Plugins’ on the left-hand menu:

Search ‘WooCommerce’ in the search bar, then click the gray ‘Install Now’ button.

After a few moments, this button will turn blue that says ‘Activate’. Click it.
WooCommerce’s helpful setup wizard will then open to walk you through the rest of the setup process.
2. Add business details
First, you’ll need to fill out your business’ details, which is pretty self-explanatory:

Make sure you select the right option under ‘I plan to sell both physical and digital products’.
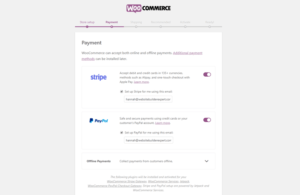
3. Select payment options
The next step is to choose the payment methods you’ll accept through your store.

As Stripe and PayPal are both popular options, we’d recommend you enable both. You can add your accounts at a later date if you don’t have them set up yet.
4. Confirm shipping options
Next, you’ll be asked to choose your shipping rates. WooCommerce will recognize the area you’re currently in, and set this as your main ‘shipping zone’, with the other option basically being ‘the rest’:

You can either set a fixed price for each zone, set shipping as free, or integrate with specific carriers (including UPS) to get ‘live’ shipping rates.
5. Choose complementary plugins/theme
The next stage is to decide which ‘recommended’ plugins to take forward to your store, and whether you want to opt for WooCommerce’s own theme.

It’s really easy to add these later on, so don’t feel you have to commit to anything right now. We’ll cover recommended plugins and themes a little later on in the article, so feel free to ‘unselect’ these for now, unless you’re sure you need them.
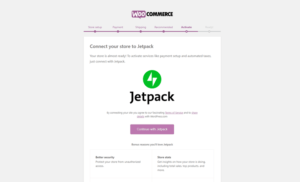
6. Activate Jetpack
In the final configuration step, you’ll be asked to activate Jetpack.

This will enable payment setup and automate taxes for you later down the line. Hit ‘Continue with Jetpack’…
…and that’s your basic configuration sorted! Now, it’s time to add your products.


